Nine Can Vegetable Soup

Nine Can Vegetable Soup from World (and Lunar) Domination:


This is an incredibly easy & delicious dinner or lunch.

Well, the name’s misleading.  Sometimes it’s not exactly nine cans.  I’ll give you the recipe as it was given to me…

Nine Can Vegetable Soup

  • 2 cans Hormel chili, any variety
  • 1 can vegetable soup
  • 1 can green beans
  • 1 can sliced new potatoes
  • 1 can mixed vegetables
  • 1 can corn
  • 2 cans diced tomatoes (for extra kick, use a can of tomatoes with green chiles in place of one can of diced tomatoes).

Optional: 1lb ground meat*

Dump the entire contents of every can into the crockpot – liquid and

all.

*Brown turkey or beef and drain and add to veggies in crockpot. Heat on low all day, or on high for less than 2 hours.

Well, sometimes I do it like this…

  1. Hormel Chili with Beans
  2. Hormel Chili with No Beans
  3. Campbell’s Beef With Barley & Vegetables Soup
  4. Campbell’s Vegetable Beef Soup
  5. Cut Green & Wax Beans
  6. Diced New Potatoes
  7. Succotash (Corn & Lima Beans)
  8. Mixed Vegetables with Potatoes
  9. Diced Tomatoes with Basil, Garlic, & Oregano
  10. Petit Diced Tomatoes


Sometimes I add other stuff.  I think I’ve put in Garbanzo Beans,Mexicorn, or

the diced tomatoes with jalapeño or chili peppers, and even plain old navy or black beans.  Sometimes I dump some of the liquid of the cans out.  I like thick soup.

I’ve used ground beef & ground turkey… both work really well.  I’m sure a vegetarian version of this would be easy to make. (Hormel makes a vegetarian chili, you can get vegetarian vegetable soup from Campbell’s, & the ground tofu, seitan, or tempeh would work well… or you could just add more beans or vegetables.)

I just put it into the crock pot on low all day.  Dinner’s ready when you get home!

I like to have it with homemade bread, or over biscuits like a pot pie.  If you’re camping and have a mountain pie iron or if you have en electric sandwich maker that seals the edges you can add some flour to thicken it up or strain it a little to make incredible filling.

I also like the tiny saltine crackers.

A any rate, we make some & it lasts a while… as a main dish, or a side with sandwiches.  It freezes & re-heats easily.

Do you make something like this?

What are some good soup recipes or easy crock-pot recipes?

Beer for Dinner: Steak and potatoes with lager | Eighteen Twenty Nine

Beer for Dinner: Steak and potatoes with lager | Eighteen Twenty Nine.

via Beer for Dinner: Steak and potatoes with lager | Eighteen Twenty Nine.


Beer for Dinner: Steak and potatoes with lager

Crock-pots really are one of the most underrated kitchen accessories. Think about it – you place raw ingredients inside, clamp down the lid, set the temperature to low, and then walk away. Four to eight hours later, dinner is served! In the meantime, it fills your house with the sweet, sweet smell of slow-roasted beef and you can knock out half your to-do list.


STEAK AND POTATOES WITH LAGER

INGREDIENTS

  • 1 large onion, quartered, sliced
  • 8 medium potatoes, quartered
  • 1 1/2 to 2 1/2 pounds round steak, cut in 6 to 8 serving-size pieces
  • 1 tablespoon brown sugar, packed
  • 1/4 teaspoon ground nutmeg
  • 1/4 teaspoon ground black pepper
  • 1 envelope onion soup mix
  • 1 bottle (12 ounces) Yuengling Lager
  • 1/2 teaspoon salt, or to taste

DIRECTIONS

Combine sliced onion and potatoes in bottom of crock-pot. Arrange steak over vegetables. Combine brown sugar, nutmeg, onion soup mix; sprinkle over the beef. Pour beer over all. Cover and cook on LOW for 6 to 8 hours, until beef is tender. Salt to taste.

☘ Market District® | Beef & Guinness® Stew ☘

This is from:  http://www.marketdistrict.com/Create/Recipes/Detail.aspx?RecipeID=136&RecipeCategoryID=8&Page=1&om_cid=s-tw-122011

It looks/sounds tasty.

Beef & Guinnes® Stew

Compliments of your Market District® Recipe Development Team
Serves: 6
Prep Time: 25 min.
Cooking Time: 2 hrs.

Ingredients

1/4 cup canola or vegetable oil
2 lbs. stewing beef
1 large onion — diced
1lb. bag carrots — peeled, sliced and quartered
5 stalks celery — cut into 1/2-inch slices
8 oz. package mushrooms — sliced
4 14.5 oz. cans beef broth — divided
14.9 oz. can Guinness® (or 15 oz. beef broth)
6 oz. can tomato paste plus 1 can water
1/2 cup all-purpose flour
salt and pepper to taste
1/4 cup fresh parsley — minced

Directions

In a large saucepan, heat oil. Add beef and all its juices, and brown on all sides, about 20 minutes or until liquid cooks off. Add vegetables, 3 cans of beef broth, and beer. Empty can of tomato paste into a small bowl. Fill empty tomato paste can with water and combine with tomato paste, then add to saucepan. Cook stew uncovered for 1 hour, 15 minutes, stirring occasionally. In a small bowl, combine remaining can of beef broth with flour to make a paste. Add flour paste to saucepan and stir to incorporate and thicken. Cook an additional 10 minutes, stirring occasionally. Season with salt and pepper to taste and garnish with parsley. Serve with crusty bread.

asparagus in phyllo dough

From Lynn on Google+:

Lynn Warren – I wrap asparagus in phyllo dough that’s been brushed with melted butter and parmasean cheese, you wrap the asparagus with it and bake. very easy, and can be eaten at room temp, etc.

Sounds ridiculously excellent & easy.  If you’re a fan of asparagus, you may enjoy it steamed, grilled, roasted, or even nuked.  I love the stuff if it’s prepared well.  This sounds like it would go over quite well.  Parmesan cheese is always a win.  Maybe some Romano… and I may add garlic.  If we wanted to get really nuts, we could wrap ’em in bacon & and the dough.

Found a recipe from Paula Deen that says to bake at 375° for 15-18 minutesGoogle for ideas!

Goofy noodles, fancy bacon, & squash? I’m in.

Bought some Campanelle because boxes of pasta were cheap, and it looked neat.

I looked for a campanelle recipe online, & this popped up:

http://www.barillaus.com/Recipes/Campanelle-with-Butternut-Squash-Crispy-Italian-Pancetta-and-Balsamic-Vinegar.aspx

I love all of these ingredients, but I may lose the onion or substitute garlic…
Campanelle with Butternut Squash, Crispy Italian Pancetta and Balsamic Vinegar
INGREDIENTS

  • 1 BOX Barilla Campanelle
  • 1/3 CUP Italian Pancetta, Julienne
  • 1/4 CUP Extra Virgin Olive Oil
  • 1/2 CUP White Onion, Chopped
  • 1 POUND Butternut Squash, Peeled, Cubed
  • TO TASTE Salt
  • TO TASTE Black Pepper, Freshly Ground
  • 1 SPRIG Fresh Rosemary
  • 1 1/2 CUP Chicken Broth
  • TO TASTE Balsamic Vinegar

COOKING INSTRUCTIONS

  1. SAUTÉ pancetta in a large skillet over medium- high heat until crispy. Drain excess fat.Set aside.
  2. HEAT olive oil in the same skillet over medium heat. Add onions and rosemary, sauté until golden.
  3. ADD the butternut squash and the chicken broth. Simmer for 10-15 minutes or until the squash gets soft.
  4. DISCARD the rosemary. Season with salt and pepper. Process half of the sauce in the blender until smooth. Thin sauce with more chicken broth if desired. Return sauce to pan.
  5. COOK pasta according to directions and toss with the sauce.
  6. TOP the pasta with pancetta , drizzle with Balsamic vinegar.

Visit BarillaUS.com for more delicious Italian recipe ideas.
©2010 Barilla. All Rights reserved.

Campanelle with Butternut Squash, Crispy Italian Pancetta and Balsamic Vinegar

Corn Salsa with Peppery Chicken

Corn Salsa with Peppery Chicken

Made this for dinner last night, it was pretty tasty.  I baked the chicken breasts instead of boiling.  I used full-size breasts, rubbed with olive oil and peppered, and roasted them at 375° for about 45 minutes.

We served w/ a little sour cream.

Fettuccine Parmesan

Looks pretty damn tasty:

“One cannot think well, love well, sleep well, if one has not dined well.”: Make this dish!


Make this dish!

This is super fast and easy, plus it is damn tasty.

The base of this recipe is taken from the Joy of Cooking, which you should really consider buying if you don’t already own a copy.

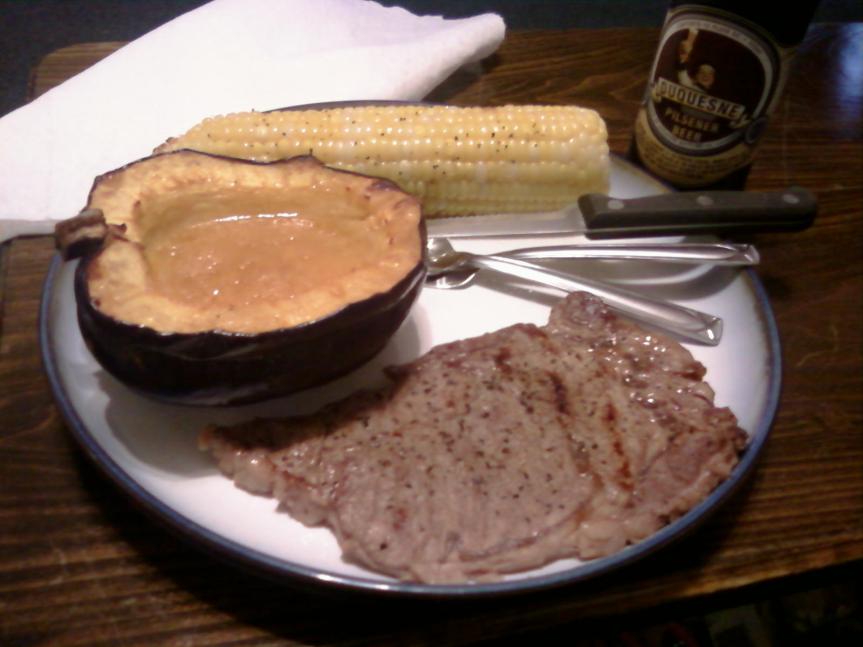
Acorn Squash, Roasted Corn on the Cob, Skillet Steaks, & Duquesne Beer

Recently, we had a ridiculously excellent fall dinner.  I could eat this meal several nights a week, and not grow tired of it.

Delicious Fall Dinner
Acorn Squash, Corn on the Cob, Skillet Steaks, & Duquense Beer!

First up was the acorn squash, which is really easy to prepare once you get the damn thing cut open.  I have recently stopped trying to go through the whole thing at once.  I use a serrated knife and poke from the beside stem into the center, then slice out form the stem all the way back around until I hit the stem again, then crack it open.

After scooping out the seeds (which I always wonder about cooking like pumpkin seeds) and stringy gross stuff, I placed the two halves orange side up in a glass baking dish in about ½” to ¾” of water.  Don’t worry, they actually generally do sit up that way without a problem.  I sliced the tops/insides a little in preparation for the next part…

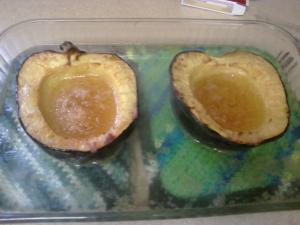
Acorn Squash, after roasting.
SQUASH!

I melted some butter (or some Country Crock spread actually) in the microwave, probably about 3 tablespoons worth, and added a little bit of brown sugar, stirred, then ladled it on the top & into the cup formed in the middle.  Add it to taste.  I don’t really ever measure this.  If you’re looking for a measurement form me, add what you think is too much brown sugar, then add a pinch more.  I also added a tiny bit of black pepper & paprika to mine this time… but I add that to almost everything.

After that, I placed it in the already pre-heating oven at 400° for about an hour and 5 minutes.  I was going for somewhere between an hour and an hour & 15 minutes, and it worked out closer to the hour this time.  Check on it around the hour mark.  This one was roasted perfectly… the meat of the squash was just melting on to the spoon, & peeling right off of the skin inside.  It was really a great flavorful vegetable.  I don’t know if this is baking or roasting, but whatever it is, it works.  It would have also been good scooped out & served like groovy orange mashed potatoes.

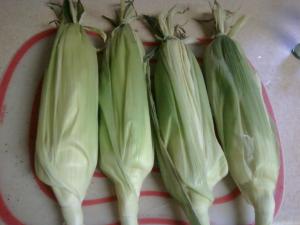
Corn, unressed, re-dressed, & bound for doom!
Corn, undressed, re-dressed, & bound for doom!

Up next was the corn, figuring temperature was more important for the squash, I typically roast corn at 425° or 450° for 20 minutes to a half hour… but figured why not let it ride along with the squash here?

My wife & I carefully pulled back all the husks… just pulled them back not off, then removed the silk.

We buttered (again, we used Country Crock’s butter approximation), salted, & peppered the corn.

Next we wrapped it back up, and tied the tops back together using a loose strand of the husk.  This doesn’t always work out, so sometimes I use foil & make little caps to keep ’em all bound together.

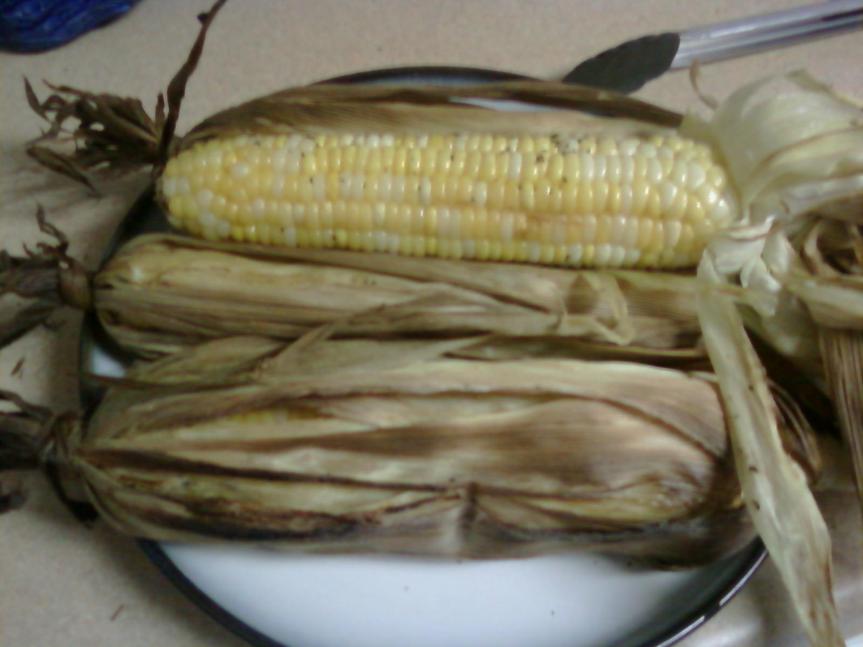
I did a whole post on corn & why you should keep it in the husk, and never ever boil it unless you’re making soup.  You can read that here if you’re interested.  As you can see, “other stuff in the oven” is not even a good excuse to boil corn.  It can go along for the ride.  Proof?  It turned out beautifully:

Oven Roasted Corn on the Cob
Why would you boil corn, when you could have this awesomeness every time?

I wish my cell phone’s camera got better shots.  I need to think farther than Facebook or Twitter when taking food photos, and get the real camera so I can post more to this blog.  The corn husks did smoke a little… but I didn’t see any flames, and it let me know when it was done.  Ha ha ha.  I’ve grown to not rely on timers so much, but to go with temperature and a gut feeling.

Oddly enough for a carnivore like myself, the steak was not the star of this meal.  We just got some thin  skillet steaks and put them on the Foreman grill oiled, salted, & peppered for about 5 minutes, maybe a little less.  They turned out fine.  The Foreman Grill seems to be my go-to tool for cooking meat until I get new knobs for by real grill outside.  I’m in a Yahoo! Group that’s a really good resource for innovative GFG cooking.

I topped it all off with the newly resurrected Duquesne Beer.  [Insert zombie and or Jesus joke here.]  I have a collection of antique bottles and have a Duke beer bottle in with my local stuff… so when I heard that they were making it again, I knew I had to try some.  I was born after the company was dissolved the first time, so I can’t compare it to the original… but it is a nice mellow pilsner that goes well with this kind of dinner.  It rounded out the meal perfectly.

It was aggravating to get my hands on some though… they’ve had a weird release schedule, and no 6 pack shops around me were carrying the stuff.  When one local pizza joint was listed as having the stuff, I went there to buy some and they had no idea what I was talking about.  I ended up buying a case, but luckily I don’t feel “stuck” with something that I don’t like.

Homemade Pizza with Pillsbury Crust

The other night, the wife & I were in the mood for pizza, but not for any of the plethora of local pizza places.  We decided to make our own.  We were going to get one of those pre-made Boboli crusts, but while at the grocery store my wife came across one of those cardboard tubes of pizza dough by Pillsbury.  We decided why not try that?  I like a puffy doughy not quite fully cooked crust.

Well, this wasn’t that… but it was tasty.  It seemed to be pretty thin, but it was flavorful.  We bought the Giant Eagle brand jar o’ pizza sauce because it was way cheaper than the real brands.  I added some brown sugar ’cause I like sweet sauce… but I’m getting ahead of myself.

My wife spread out the dough and I brushed on some extra virgin olive oil and sprinkled on some garlic powder.  Then we put down the sauce & brown sugar mixture, and a 2-cup bag of “4-cheese Italian” shredded cheese.

We put diced green peppers, turkey pepperoni, and canned mushrooms on the whole thing… and I put diced Canadian bacon & chopped olives on my half.  I topped it off with a little leftover taco cheese, and put some crushed red pepper flakes on my side.

We baked it according to the instructions on the weird cardboard roll, and it turned out great.  We need to do homemade pizza night more often!  I think we’ll skip the EVOO step though… I don’t think it was all that necessary.

This slideshow requires JavaScript.

Homemade pizza FTW!

Leave your corn in the husk

Oven-Roasted Corn on the Cob

The only way to cook corn on the cob to me any more is in the husk.  Be it on the grill, over a campfire, or in the oven… it’s the way to go.  Next would be microwaving… but for goodness sake… please stop boiling corn. All the flavor is sucked right out of it into the water.  Unless you’re making a creepy corn-based soup stock… quit it!

There are several methods online, but I’ve found this one to work well for our purposes…

  1. Soak the corn in water for a while (or even overnight) if you have the option… this prevents the husks from burning.  But, I must confessed that I’ve skipped this step several times with no disastrous consequences.  (Also, if you’re storing corn in the fridge, it may have the same effect.)
  2. Peel back the husks, don’t rip them off!  Leave ’em attached at the base.  Pull of the silk… we have a corn silk brush that works really well for this.
  3. Brush with some butter, I can’t believe it’s not butter, or even Mayo or Miracle whip.  The latter two sound crazy, but it’s unhealthy and decadently awesome.
  4. Season with your favorite spices… I prefer fresh ground black pepper, hot shot, and some salt.  The wife likes Season-All.  I hear lime juice goes well with the aforementioned Mayo slathering… I guess it’s a Mexican thing?
  5. Gently wrap the husk back up over the corn as closely as you found it.  If you’re adventurous, use one of the outer husks to tie it back together at the top.  If not, use a string or make a nice foil cap.

Now the cooking part…

  • The Grill: All grills are different, but this is probably my preferred method.  I generally put them on at whatever heat I need to cook my “main” dish… if they’re the star of the show, I’d say a medium-high heat is in order, turn them often.  You’ll get some nice grill-lines… it’s generally done once the outside layer of husks is charred & brown.
  • The Oven: The main advantage to using an oven is a nice even cooking.  We did these in the oven right on the cooking rack the other night at 425° for 30 minutes, just flipping once… and they were absolutely perfect.
  • The Campfire: If you haven’t cooked corn on the campfire, shame on you!  Get the fire going nice & hot with some nice white coals at the bottom.  (They’ll be glowing orange if it’s dark out.) If you’re using a cooking grate, I’d put the corn on top around the outsides, so it wasn’t being hit by direct flame.  The pre-soaking does come in handy here.  If you’re not using a cooking grate… I’d wrap the re-husked corn in foil and place it on the coals under your fire ring, or just on the inside.  Check it for done-ness when you’re nervous about it… ’cause you’re probably right… but be patient.

I’d love to hear how you cook corn, and what you top/pair it with!

Oven-Roasted corn in Bethany's little corn-dishes.